Translate

Monday, 26 March 2018

needle felted badges

Nearly all my felting is wet felting,but I decided to have a go at making badges.I wet felted the backgrounds then needle felted the designs,


 I embroidered a few basic flowers for detail.It is quite time consuming but enjoyable.
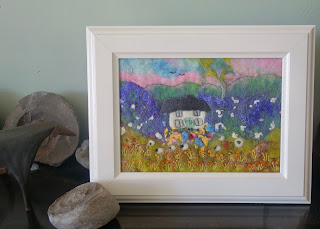
 So far I havent stabbed my fingers.!This picture was wet felted but the tiny sheep were needle felted once it was dry.

Wednesday, 21 March 2018

snow dyeing

One benefit of the last cold snap was being able to do some snow dyeing.I put  damp soda soaked cotton in a container ,I had soaked it for an hour . It was placed in a vegetable rack so that as the snow  melted the water could run away. I then shovelled snow on top and wearing  a mask I sprinkled procion dyes on the top .
You should wear a mask as you don't want to inhale the dye powder.
It was then left till it melted about two days , before it has melted quicker
The one below had indigo blue and purple dyes sprinkled on.
A small section of the one above
This one was lime green and purple the lime green has almost disappeared.The whole process is a bit hit and miss but then so is most of my dyeing

Monday, 19 March 2018

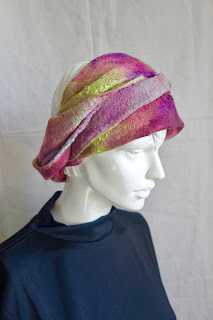
Here are the two Infinity scarves I made for my Etsy shop.The top one made with the space dyed wool makes me think of raspberries and kiwi fruit.I love it ,it really zings.The purple one is very long and goes around your neck three times.
The can also be worn as headwraps the poor model looks very anaemic after all our cold weather.
They are fun to make and easy to wear as they stay put and are very soft

Sunday, 18 March 2018

Dyeing

I dye the wool and fabric for my scarves. I really love dyeing it doesn't always turn out quite how I wanted it to but that's fine . The first photo  both fabric and wool were spaced dyed.Not always easy to get a good colour match as wool uses acid dyes and cotton uses procion.If I use silk they can be dyed together with acid dyes.
I was pleased with the result and the finished scarf looks great.
The dyeing below is more of a contrast.


I will post a photo of the finished scarves when we get a good enough day to photograph them.

Saturday, 10 March 2018

the finished scarf

Rinse the scarf and lay it flat to dry

how to make a nuno felted infinity scarf part 2

 It was the wetted with cool soapy water plastic on the top it had bubble wrap underneath.I then use an electric sander which is brilliant in getting the wool fibres to migrate through the fabric.If you don't have one it's a lot of rubbing over the plastic with your hands. when you can pinch the wool and it lifts the fabric up it has migrated through. Then it has to be turned over and the other side laid out and use the sander or rubbing on this side. Keep adjusting the plastic in the centre and moving the middle so that you do not get a fold like this.Now you can start felting.With a pool noodle roll up the scarf wrap in a towel and roll 100 times ,then open it up quarter turn roll up and roll another 100 times. Keep doing this until felted , or you can put it in the tumble drier on cold well wrapped up around a damp towel and covered in plastic

How to make a nuno felted infinity scarf

I find these very comfortable to wear as they stay put.
I started with a length of dyed scrim 73 inches by 14 wide. If you divide your wool fibres in half it helps to get the two sides equal
I had sewn the two ends together.You can use any fine fabric such as silk of silk chiffon or muslin and scrim.To stop the two layers from felting together I put a piece of builders plastic between the two layers.I then laid a layer of wool fibres on the top.If you want a thicker scarf you could lay two or three layers remembering to alternate the way in which they are laid downI laid some red tencel fibres on top for some colour and sheen